What size objective module?

mickeymouseoutfitters

Active Member
Messages
348
I'm looking into getting a swarvo spotting scope and I can't decide what objective module to get. I plan on taking pics with a DSLR and I would like to know if the pictures turn out different from each size of module. Looks like they have from 65 to 95. Any advice would be nice. Thanks in advance.
 
To answer your question "if the pictures turn out different from each size of module"
There is a couple things to consider here.

The objective diameter being larger on an 85mm vs a 65mm should allow you to use faster shutter speeds in low light.

The 65mm and the 85mm objectives have the same focal length. So, other than the light that the 85mm would let in the only other thing that you might see different is vignetting. Not what most digiscopers call vignetting, but actual photographic vignette.

This is about to get very complicated to understand in the written word.
Most digiscopers use the term vignette totally wrong. What most digiscopers call a vignette is actually just an eye relief problem.
A vignette is caused by a math problem. Think about a triangle.

Make your spotting scope objective lens into a triangle.
The longest leg of the triangle is the leg runs along the outside edge of your spotting scope.
Compared to the leg that runs down the center of the spotting scope, the outer leg is longer.

So, change subject to light. Light enters your camera and interacts with the sensor to create an image. But the light that travels down the center of the scope takes less time to get to the sensor than the light traveling down the outer edge of the scope.
So, the center of an image becomes more "exposed" than the outside. This gives a darker, less exposed ring around the outside of the photo.
Thats an actual photographic vignette. It has to do with shutter speeds, the size of the angle created by the scope diameter.

Why does that matter?
Well, your camera is going to crop the circular image into a rectangle right?
Looking through a scope, you see a circle, the camera will produce a rectangular image.
So, the outside edges of the image will be cropped due to the difference in the shapes.

With different objective diameters, you may see more photographic vignette with one scope over the other. But, it will look very different than you think. Not like what most digiscopers call a vignette.

This is a photographic vignette caused by the angle of a spotting scope and the light interacting with shutter speed, and distance travelled.

213vignette.jpg


See how the outside corners have a fade to dark look? That is a vignette.
I removed the subject so that you could focus on the vignette.

Not that a vignette is a problem. Its something that happens to all photographers.
The same thing happens with a 600 or 800 mm camera lens.
Big front end, tapering to a small camera sensor. Its just part of the game.
But, you may see more of it with one size objective than another.

Its also a function of camera settings like shutter speed, ISO, ect. Its a combination effect.

Between your 65 and your 85mm objectives, the biggest difference will probably be the first issue. Shutter speed range due to light getting to the sensor.

But, if you go up to the 95mm objective you have a new set of rules.
The 95mm has a longer focal length.
Its going to get complicated again.
So, whats the difference between the ocular module for the 65mm and the 95mm?
Nothing. They all use the same, interchangeable ocular module.
So, why the difference in zoom ranges between the 65, 85, and the 95mm?
Well, the 65 and the 85 have the same focal length. Thus the zoom on them is 25X at the low end.
When you place that same ocular module on the 95mm the bottom end zoom jumps to 30X. Why?

The ocular module did not magically gain magnification. Its because the focal length of the objective provides more initial magnification before the magnification of the zoom lens is applied.

What that means for your photos is not only more light due to the 95mm objective, but you can get closer photos with less magnification.
Magnification kills your light. The more magnification you use, the less light you will get to the camera.
The 95mm really makes a difference here. You will be able to get a much better overall result more often with the 95mm.

But, is it worth it? Is it worth the extra money and the extra size and weight?
Do you care that much?
Just depends on your preference. And your budget I guess.

I can tell you one thing, buy the TLS APO.
If I had to make the decision myself, I would buy the largest objective I could afford.
If you can afford the 95, but not the TLS APO, I would buy the 85 and with the extra money, get the TLS APO.
Same for the 85, if not the 85 and the TLS APO, then the 65 and the TLS APO.

I can go into a lot of detail as to why and how it makes a huge difference if you would like. But the bottom line is digiscoping is a mess. Lots of problems to overcome to produce fantastic results. The TLS APO eliminates several of the biggest problems.

It makes your job much simpler and allows you to focus on your manual control of the camera, rather than messing with dual focus mechanisms, alignment problems, ect.
You will be 50 times faster and will get a higher percentage of quality images with the TLS APO.

Sorry to be so long winded. Its a very complicated subject. There are no easy, short answers to it. Well there is one, "yes, your pictures can turn out different with each size module".
But, that leaves a lot of other questions out there.
Most of the time, you will not notice the differences.
I tried to be helpful.


7047logoweb.jpg

www.newfoundlandbighornsheep.com
 
I had to read it a couple of times and I'll probably read it a few more. It was very informative for a beginner and i am very grateful for you being "long winded". I love taking pictures, even when they don't turn out.
 
Great explanations! I'm not a photographer, but you explained it in terms that the layman, non photographer can understand.
 
One thing that I forgot to mention was the sensor size on your camera.

If your camera has a full frame size sensor, the TLS APO will not cover it.

APS-C size and micro 4/3 will work fantastic with the TLS APO.

If you get set up and need some advice, get a hold of me.
I can send you a bunch of ideas and tips.
 
Lately it seems when I buy something, I usually find something better later and I get stuck with what I have. I don't want to make that same mistake again. I haven't purchased anything yet. I think I'll be getting the swarvo atx 25-60x85 with the tls apo. What camera do you recommend? I like canon cameras. I was think of getting the 6D or the T5.
 
LAST EDITED ON Dec-30-15 AT 10:38AM (MST)[p]I am guessing you meant to type 60D rather than 6D.

If you truly meant the 6D thats a full frame sensor.
the TLS APO lens is smaller than the sensor in the camera so you will see a large, dark, ring around all your photos no matter what.

Fantastic camera for lenses that work with full frame sensor, but not a good choice for the TLS APO.

However, if you meant the 60D which is an APS C size sensor, that will work fine.
The 60D has been discontinued by canon so if you find one, they are probably selling at a very good price. Better buy it quick.

488tlsapo.jpg


As you can see, the 6D has a much larger sensor. The TLS APO lens is not big enough to cover the full frame sensor.
It is Just barely big enough to cover the APS -C sensor on the T5i, and will definitely cover a micro 4/3 sensor.

No matter the 60D, or the T5, they both have the digic 4 processor. Digic 6 is current.

I actually have a T series camera and a 60D at the moment. So, I can tell you that both work well with the TLS APO.

Manual controls on the 60D are easier than on a T series. Plus you have more ISO and shutter range on the 60D.

Both cameras are compatible with the RS-60E3 shutter release cable, and you will want one of those for sure.

Are you going to go straight or angled on the scope?
If you go straight, you will want a flip out, articulated screen on the camera for sure.
With the angled scope I find it doesn't matter much.
 
"Lately it seems when I buy something, I usually find something better later and I get stuck with what I have."

As far as digiscoping goes, you won't have this problem. This is by far the best digiscoping system that has ever existed. However, thats not to say that you won't find something better.

The results you can get with the TLS APO system are very very good. I have several 20" X 30" prints hanging on my walls that I digiscoped with this system.

You can get very high quality results. But its not as easy as just turning on the camera.
Let me give you some advice regarding this purchase, before you make it.

First, you will need to spend a lot of time working on your ability to manually focus accurately. The TLS APO is perfect because it does not have a focus. So, all you have to do is focus the scope to what the camera sees.

When I say "to what the camera sees", I mean it. Not to what your eye sees.
I will explain. Ever walk up to someones scope and look through it and find that you have to re focus it? Happens all the time right? Well, "IN FOCUS" to your eye and my eye and that guys eye, can all be different. You will find that this is the same with the camera as well.

Lots of guys struggle with what I call the "dual focus nightmare" with digiscoping.
You focus the scope, to your eye, then place a camera on the eye piece and try to get the camera to focus its lens on your scopes image.
Well, what if the scopes image is out of focus to the camera? The camera will never actually be able to get a crisp, sharp, clear focus on the out of focus image.
The camera just auto focuses to the best image it can then you take a picture that will never actually be in perfect focus.

You see this all the time with traditional digiscoping set ups. Some guys get lucky and "in focus" to their eye is very near "in focus" to the camera they use.

The TLS APO eliminates this problem by not having a focus, its a pancake lens that was designed to be used with the new X series scopes and it is always "in focus". All you have to do is focus the scope itself.

Second thing you need to be very aware of is that you will need to become very comfortable with your camera.
I will tell you right now, YOU CAN TAKE A VERY POOR PHOTO WITH THIS SYSTEM.
You can also take a very high quality photo.
If you are the type who sets the camera to the auto mode and takes photos, you will find frustration with the money you spent, and the photo you get.

Seriously. Take that to heart.

You will need to be able to shoot in manual. You will need to be able to choose an ISO setting, and a white balance, and a shutter speed.

It will take lots of practice to get good and fast. Fast is important. How many times do you have all day to photo that buck before he walks over the ridge?

You need to get in focus, and adjust an ISO, and get your shutter speed correct all before the animal moves out of focus, or moves out of frame.
Its not easy.

If you think that just buying this system will make digiscoping easy, you are fooling yourself and you will probably, "buy something, I usually find something better later and I get stuck with what I have."

I am not trying to scare you. This is simple to learn, you have got to spend the time practicing it though.

Third, you will need to be VERY selective with your tri pod head.
Worst thing in the world is to watch someone adjust the tri pod, focus, add a camera, and have the tri pod head settle into a new position with the subject below the frame.
You don't have time for this crap.

So, does that sound like you want to digiscope?
Seriously, the biggest thing outside the equipment, is going to be the learning how to use the camera to get the best result.

If you are a guy who takes the easy route, you may want to save the money from the camera, and the TLS APO and look into super zoom bridge cameras.

Panasonic makes a very good bridge camera. The best out there if you ask me.
Sony, Canon, Nikon, they all make them. 50 - 60X zooms, auto focus, correct exposure.
Its very easy compared to digiscoping.

I actually have my digiscoping set up, a super zoom bridge camera, and traditional telephoto camera gear.

I can tell you that a traditional 800mm camera lens is by far the easiest and most consistent for quality. But its also very expensive.
The Swarovski X series with a TLS APO has the most range and will give a competent user the best ability to get a quality image for a mid range price.
The super zoom camera is by far the least expensive, gives the lowest quality and is the easiest to use and carry around.
Its really not a bad option for a guy who wants to just take pics of the stuff he sees in the hills.

For guys who demand a quality photo and want to be able to get it at long range, the digiscoping set up is the best bang for the buck, but requires the most effort and learning.

We should also take some time and discuss video.
We should also discuss low light performance. There is a significant difference in low light performance when comparing a super zoom to the digiscoping set up.
A 60D and that 85mm ATX can produce far better results than the super zoom, but again, you gotta know how to use it.
 
BIGHORNtracks...Thank you so much for your detailed explanation. You have answered so many of my questions. Very informative!

Every hunting season you miss is one you can not make up
 
LAST EDITED ON Dec-30-15 AT 02:02PM (MST)[p]Moose, it seems to be a subject with some interest.
I am no expert. But I do play around with it a bunch.

Digiscoping has been an aftermarket mess for years.
People trying to capitalize on the market by building one size fits all adapters and guys trying to make things work on their own.

The Swarovski X series and TLS APO is the first system that is designed from the scope to the adapter to do exactly this. No more aftermarket junk.
Rather than work around the issues, they tackled many of them head on and eliminated them.
Its still not automatic, but its far better than it has ever been.

The one size fits all adapters made it difficult to do well, compounded by a wide array of camera shapes and lens sizes.

As I see it, the adapter nightmare was a hurdle to many. It still is a hurdle to guys with other systems outside the Swarovski X series scopes.

There is a series of issues with digiscoping.
The most common problem that people would like to fix is over exposure.
Washed out images, that look like a photo that has been sitting in the sun for years and lost all its color depth.
The sad thing is this is the most common problem with digiscoped photos, and it is the easiest to fix. All you have to do is learn to adjust 3 little camera settings and this is no longer a problem.

The second most common issue seems to be focus.
This is often related to the dual focus mess that I was talking about earlier.
This is more difficult to fix than the over exposure issue.
The best method has been to place the camera on the scope, focus the camera, re focus the scope, re focus the camera and so forth until you have tweaked both systems into a crisp focus.
The issue is, most of the time you don't have the time or patience to go back and forth, tweaking it. Moving subjects dictate your time frame.
The TLS APO system has totally eliminated this issue by eliminating one of the lenses that requires focusing before you can take a photo.

The third biggest issue I see is unstable equipment.
The TLS APO can not fix this issue for you. Getting on target fast and staying there, as well as being solid when on target is a totally different, but significant issue.

Now, back to mickymouse?..

One thing that I neglected to get into at all was video.
Some guys like photos, some guys like shooting video. Most of us like doing both.
Some DSLR cameras are way better at shooting video than others.
Often you will find that DSLR cameras take far better pictures than they do video. Especially with the older model DSLR cameras. Since you like Canon, Canon makes several C series camera bodies that are cinema DSLR. They are designed to take much better video, and they also come with all the jacks and inputs for video. Most DSLR bodies do not.

It is something to be aware of, if high quality video is of high importance to you.
I will attempt to show this here.
I digiscoped this photo and this video with the Exact same Xseries set up and same exact camera. The subjects were very similar distance, the magnification was the same, the main variable here being video v/s still photo.

The top picture is a still photo that I digiscoped.
The bottom picture is a frame taken from a video that I digiscoped yesterday.

1124videovspic.jpg


The DSLR that I used on these photos favors still photos over video footage.
The video footage is fine. Its better than most digiscoped images, but it can be better.
Much better.

Look, this is a fact.
I you look through your spotting scope, and visually see a certain level of quality, there is no reason that your camera can not capture the exact same level of quality that your eye sees.

People tell me all the time, "you only get that level of quality because you have a $4,000 spotting scope."
That is totally untrue. Sure good optics help. But the basic fact is that if your scope, any brand, any size, can produce a quality image for your eye to see, it produces the exact same image for your camera to record.
The only reason you don't capture it is because there are obstacles in your way, and you don't care to learn to remove them.

Basic obstacles like exposure, and focus. Correct light source settings with white balance.

You have the power to remove these obstacles. If you try. The X series system, and the TLS APO just make it a bit easier.
Learn to use your camera, fix your over exposed photos.
Work through focus difficulties.

You will eventually capture the same image your eye sees through the scope on your memory card. If you don't capture the same thing your eye sees, when you look through the scope, you may want to really sit down and figure some things out.

Some guys like cell phones, some guys like point and shoots, I like cameras with high levels of adjustability, easy access controls, and large sensors.
When you print at 20" X 30" you see the flaws that come with small sensors, and limited controls.

You can buy a whole new system, or you can keep an old one. Both are capable of great things, if the operator applies himself.

Anyways, back to video.
I know that Panasonic has some very nice micro 4/3 cameras that are 4K video compatible.
4K is just a resolution thing. It does not mean that you are going to be getting high quality video. It may be something you want to look into if video is a priority for you.
For me photos are priority, video is a nice afterthought.
So, regular DSLR camera bodies are perfect for me.

DSLR cameras often increase in adjustment as the price goes up.
Lets say for example a canon T3i, the ISO increments on that might start at 100 and then double to 200, 400, 800, 1600, ect.
Where a higher end camera body like the 60D would have a starting point at 50, then 100, then 160, 200, 240, ect, up to max of 6400 or whatever.
More range allows for more specific "fine tuning" to the conditions you have.
The same will be true for shutter speeds. Basic, bottom end cameras have less "range of adjustment" than the models like a 60D or 70D.

Not to mention that the manual controls get more accessible with the advanced models.

DSLR video is usually even more limited. A basic model starting out with an ISO bottom of 200 when the same camera shoots photos at 100, or 50 ISO.

I hope all of this is helping rather than frustrating you. You made it clear that you wanted to be sure before you bought, so that you only had to buy once. I think the main thing in avoiding regret purchases is being fully aware of what you are buying. No surprises often leads to happy product owners.

Thats why I am making sure to explain over and over that this is not a turn on and play thing. Its much better than typical digiscoping, but if you want great results, you are going to have to become a photographer.

Ask any wildlife photographer with a $5,000 camera body, and a $15,000 camera lens if you can just buy that set up and take world class photos. He will probably chuckle at you and then tell you there is a lot more to it than that.

I can tell you this, you buy it, and have a willing to try attitude, I will help you through the learning curve part of it.
 
BIGHORNtracks... You sir, are a wealth of information. I've read and re-read everything you've said and now I have a much clearer picture of things I need to do to become a better photographer. Thank you for your time in putting together such a great explanation. Also, I really like your photo subjects.

Moose

Every hunting season you miss is one you can not make up
 
Bighorn- I really enjoyed all that you have shared. Lots of great information. Hope I don't derail the conversation but had a few questions.

What would you recommend to someone who has a different spotter already and the funds are not available at this time to upgrade to Swaro X model? I have a 70D body and 85mm vortex razor spotter.

Also I would love some tips/information as I am still getting used to the camera and adjustments after moving up from point and shoot. If a p.m. would be better let me know. Thanks
 
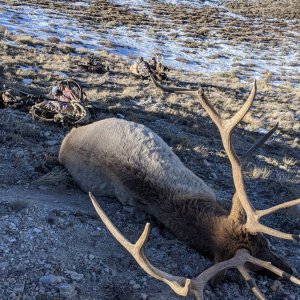
TRDhunter, I totally understand that we all cant afford the X series system.
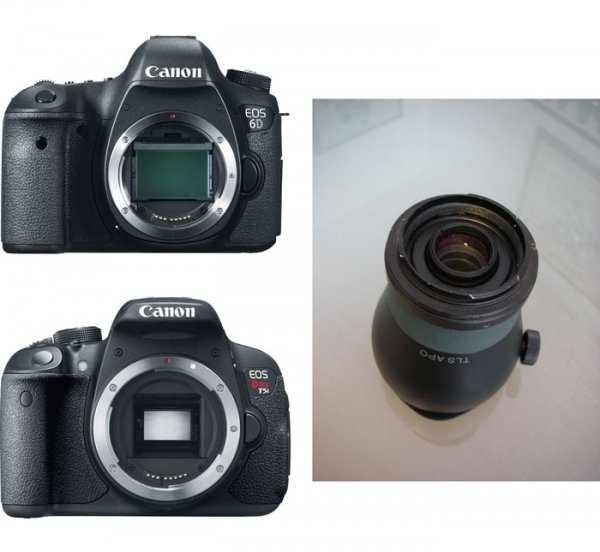
It can be a lot of money. The scope, TLS APO, and a camera like a 70D would set you back as much as a my first automobile purchase.

I happen to have a vortex razor 85 as well. Have you looked at the vortex D.C.A.?
The kit comes with 30mm, 37mm, 43mm, 52mm, 55mm, and 58mm filter thread adapters that would screw onto the front of your lens, if you have a lens that has one of those sizes of filter threads on it.

The Vortex DCA is a decent system. You will still have the dual focus issue, and you will want to shoot in either full manual, or aperture priority.
I would shoot in full manual, and just use the wheel on the back of your body to open the aperture all the way up.

You will have the dual focus issue with this system since both the scope, and the camera lens have their own focus mechanism. This just takes a bit more time to focus properly.

Like I said earlier, if your eye can see a high quality image through the scope, your camera should be able to capture that same level of quality.

Set up your stuff in your neighborhood, settle on a stop sign, or something like that.
Focus your scope to your eye. Then add the camera to the scope. Flip the switch on your lens to manual focus. focus the camera lens.
Then, with the scope and camera still connected, fine tune the focus on the scope and then the camera lens, until you get a perfect focus.

Just do that bit of it, with the camera set to the green, auto setting.

Now turn the top dial to manual mode.

Push the live view button that turns on your LCD screen.

Now, push the DISP button until your display shows your white balance, your shutter speed, your ISO, and other display functions.

It should look like this.

3518imgp2707.jpg


Now we have to just adjust the camera settings.
Do not fear doing this. This will not screw with any other settings on your camera. This will only change things in the manual mode.

Press the Q button and it will highlight the white balance setting. To adjust it, you use the small wheel on top, by the shutter button. Not the large wheel on the back. That one is for adjusting your aperture.

Turn that to match your conditions.
If you are outside you only need it set to one of three options.
Daylight, for bright, sunny conditions, shade, or cloudy. I use shade when I am in the sun, but the subject is in shadows, and I use the cloudy setting when the sky is overcast.

Thats it.

So, arrow down to your next icon. Should be a picture style. Set this to the L mode for landscape. I know you are not taking landscapes, but just set it there anyways.

Set the next one to standard, the new one to whatever quality level you want. Raw if you have software that will read raw, raw+L if you want jpeg files, ect.
Next to single shooting, or multiple if thats what you want, and then live mode on the next.

Press your Q button again and this will exit this menu, back to the live view, with your display.

Don't worry, you don't have to do that every time, The only thing you will need to adjust there is the white balance.

I like to do this before I encounter a subject.
If I am out and the conditions are overcast, I turn it on, set the white balance, to the sun conditions and put it away.
Of course things change, and it is real easy to hit that white balance and change it to the current conditions.

Now, the rest is super simple.
We are focused, we have the camera settings in a good place to begin with.

These next steps are where the majority of your work is done time in, and time out.

Turn the wheel on the back of the camera body and you will notice that the image brightens and darkens. Note the number for aperture setting is changing.
Use the lowest number that your lens will allow you to use. If you have an F2.8 lens, turn it all the way to F2.8 If you have a low end of F4.0, set it there.
You can see how this is letting light in, or cutting it off. We want as much light as we can get.
This is what the aperture priority setting is doing. For you, with the 70D, its much easier to do with the aperture wheel.

Push the ISO button on the top of the camera.
You will notice that the bottom bar changes, and the only icon left along the bottom is the ISO setting.
Turn the wheel on top, next to the shutter button until the ISO reads 100 if you have bright sunny conditions, or 400 if you have less sun.

You will be more comfortable with ISO and where you want it as you gain experience.
My rule of thumb, always use the lowest ISO you can get away with and still freeze motion.

Push your ISO button again to return to the menu.

Now you only have one thing to adjust, thats your shutter speed.
Without pushing any other buttons, you would be able to just turn the wheel on the top and the shutter speed will adjust.

Turn it one way, the image darkens on the screen, turn it the other way, the image brightens.

Now, set the shutter speed where you want it, and take a picture, but wait, don't do anything else yet!
I want you to adjust the shutter speed again and take another one. Adjust the shutter speed until the image darkens and nearly becomes invisible in the darkness on the screen, then take another picture.

Now review the two photos.

What you will likely see is that the first picture you took is overexposed and the second one is nicer.

Why?

Its because you have made a mess that the camera software can not understand.
The camera software has been programmed to understand how to take photos through a camera lens.
You have a camera lens, and an adapter, and a spotting scope all stacked up in front of the normal situation.

So, the camera software is not reacting properly.
It has no idea that you have added all this stuff to the front of the lens.
Its not compensating for any of the extra glass you have added, or the other conditions that the spotting scope creates.

Thats why you have to do it manually.

It feels cumbersome and difficult when you first do it, but if you do it often you will become very fast at it, and very good at it.
I can now perform all these manual functions faster than a guy can digiscope with a point and shoot, or a cell phone. But it took a couple years to figure out what ISO and shutter speed combos you need to get the exposure right.

I will try to make a little video of this with the Vortex and a DSLR to make this easier on you.

www.newfoundlandbighornsheep.com
 
LAST EDITED ON Jan-04-16 AT 02:14PM (MST)[p]TRDhunter.

I made a little video for you to check out.

https://youtu.be/ypQPr3zWHDk

Hopefully it helps with a few things.
Basically the new Swarovski system and the TLS APO just make things easier, faster, and more efficient.

But the camera settings are the same, with the exception of aperture. The TLS APO has no aperture adjustment, unlike the lens on the camera you will be using.

I do not have the vortex adapter, so I had to set up a mess of tripods and crap to make that little video. The results should be the same.

9602imgp2708.jpg


I used a 28mm macro lens to do the digiscoping.
If you have the stock zoom lens that came with the camera, (typically the 18 - 135 mm) I believe that lens has a 67mm filter thread.
It would not work with the vortex DCA.

You may have to be in the market for a new lens.
If you are, go for a fixed lens, not a zoom lens.
I like the macro lenses for digiscoping, not a wide angle lens. I have tried it with wide angle lenses and you cant get close enough, you always see the eyepiece around the edges.

That little video ought to get you going on the basic stuff.
It gives you an idea of what to expect.
Obviously if you have a live subject that is on the move, it becomes much more difficult since you have to reposition the scope often and refocus.

That is why any steps you can cut out and eliminate make you more successful in the long run. The faster you are with the settings, and the more experience you have with it, the more consistent you are.

Its always frustrating at first, but it gets easier the more you work at it.

Let me know if I can help you with anything else.
I don't know much, but if I can answer any questions you have, I will.

5347bird.jpg


That is the image we digiscoped in the video.
Not a stunning image by any means. Very basic.
But you can see that its does not have many of the typical issues related to digiscoping.

Of course on moving subjects, with those settings, you may see poor images.
On a moving subject, you need to freeze the action. So, You may have to bump up the ISO, so that you can also bump up the shutter speed.
On a day with some sun, you can get away with lower ISO and faster speeds.
Conditions dictate the settings.
 
Thanks for that cool little video. Question: I have a T2i and with it comes the Canon photo program. Can I just change the white balance using the photo program ? Or is it better to do it on the camera? Just thinking of set up speed...


Moose

Every hunting season you miss is one you can not make up
 
Moose, with the canon software and a raw image file, you can change that, or customize it as part of the editing process, thats not my personal preference, but if you just want to set it to daylight and never move it, then adjust later, thats up to you.

I don't store files on my computers, so I try to get things as close to perfect as I can at the original image.
I would have to edit, and re edit the same photo every time I wanted to do something with it.

Its not a slow process to adjust it. As you become accustomed to it, you won't even notice you are doing it. The most difficult and time consuming part is the dual focus issue.

Whatever works for you. There is not a right and wrong way to do it. As long as you are getting images that you are happy with, thats good enough. If you are not, then we have some work to put in.
 
BIGHORNtracks, Thank you for the excellent information, it was very helpful. I have a Swarovski Atm 25-50x80, the tls apo and a canon 7dii. I'm looking forward to photographing some big rutting mule deer soon and I am glad I found this post! [font face="verdana" color="green"]
Jake Swensen
 

Click-a-Pic ... Details & Bigger Photos
Back
Top Bottom